Configure Portal for ArcGIS
The Rizing web applications can be configured to allow its’ applications to consume map service data from a secured map server federated with an ArcGIS Portal.
Configuration
To allow the applications to consume data from a secured map service which is federated with Portal for ArcGIS, the following steps must be taken:
- Sign into your Portal for ArcGIS instance.
- Go to Content.
- Click Add Item > An Application.
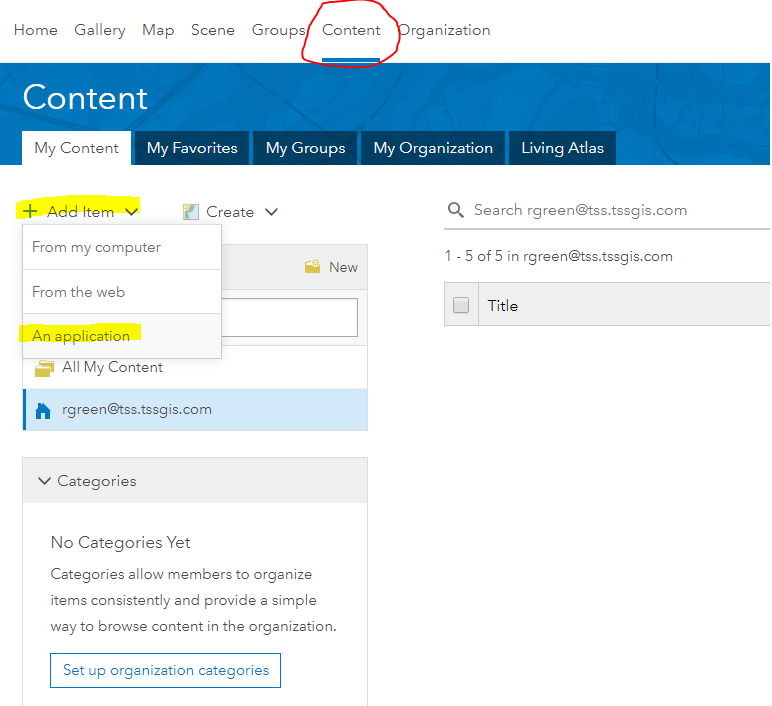
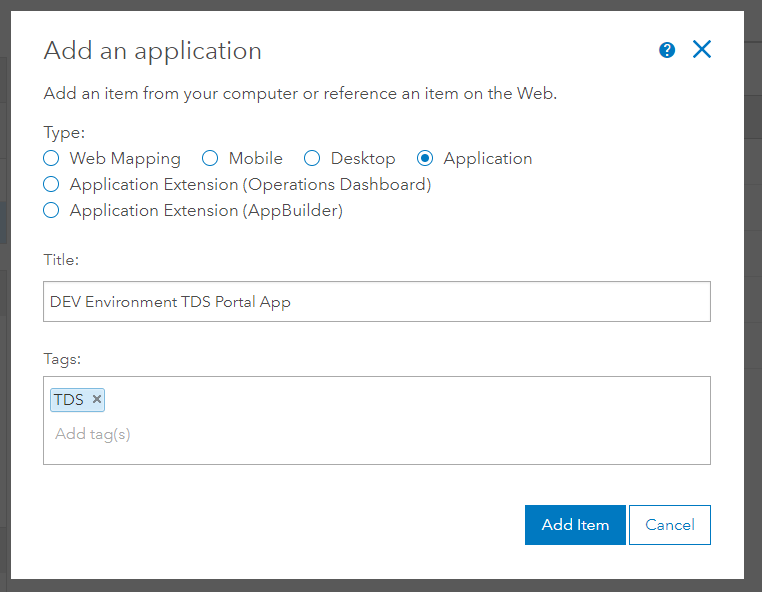
- Select Application.
- Enter a Title.
- Suggestions:
- DEV Environment TDS Portal App
- STG Environment TDS Portal App
- PRD Environment TDS Portal App
- etc
- Suggestions:
- Enter Tags.
- Click Add Item.
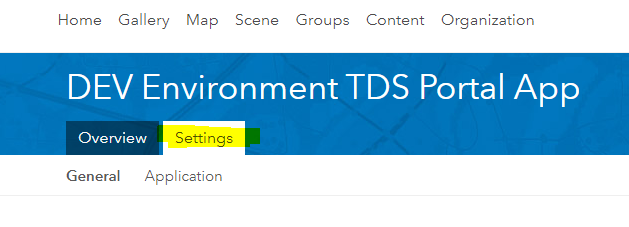
- On the newly created Application page, click the Settings tab.
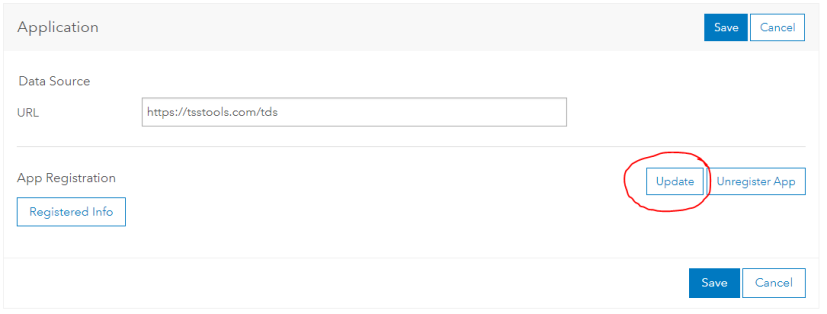
- Under the Application panel, enter the URL the to Application Manager site.
Note: This will allow users to quickly launch App Manager from within your Portal for ArcGIS site.
- Click the Update button.
- Enter in a redirect URL that will point back to the following URL:
- YOUR_TDS_URL/apps
Example:
- https://YOUR_TDS_URL/apps
Note: This URL must match the exact URL that will be used to access TDS.
Note: It is recommended to add both http and https protocols.
- http://YOUR_TDS_URL/apps
https://YOUR_TDS_URL/appsNote: It is recommended to add both the external domain (if applicable) as well as the PC name of the TDS server (or whatever URLs will be used to access the TDS site), to cover both internal and external access (if applicable).
- https://YOUR_TDS_URL/apps
http://YOUR_TDS_URL/appsNote: Ensure that you click “Add” to add the Redirect URI to the list
- https://YOUR_TDS_URL/apps
- YOUR_TDS_URL/apps
- Click Update to accept the added Redirect URIs.
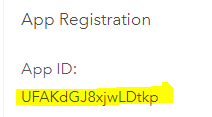
- Make note of the App ID value. You will need it to enable Portal for ArcGIS authentication for your data source in App Manager.
- Load App Manager (TDS) application and log in with an Administrator account.
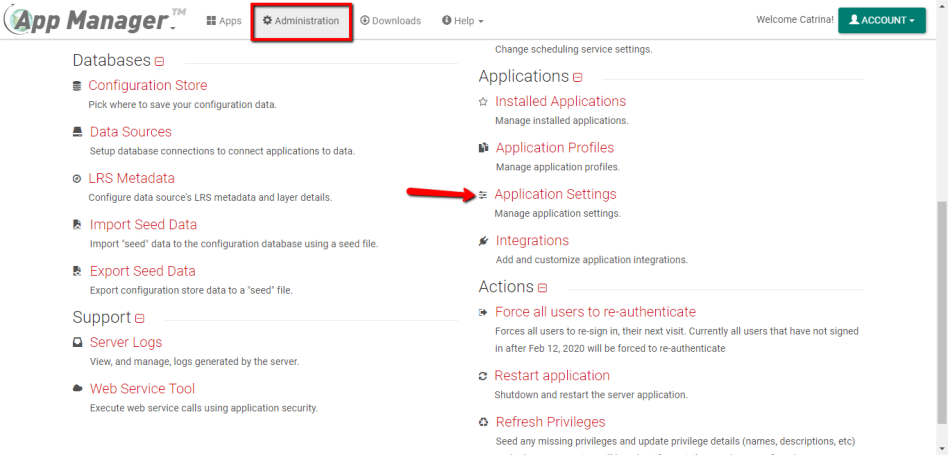
- Go to the Administration page (button is accessible from the top navigation bar).
- Click the Application Settings link under the Applications group heading.
- Enter an ArcGIS Server Geometry Service URL that is hosted on the secured map service (federated with Portal for ArcGIS).

- Enter an ArcGIS for Portal URL.
- Enter a Portal App ID which is the App ID value noted in the previous step above.

- Click the Save button (located in the bottom right corner of the page).
- Portal is now configured within TDS, however an application will only try to authenticate with Portal for ArcGIS when a data source is marked as “Service requires ArcGIS for Portal authorization”. See below to enable that setting.
- Navigate to the Administration page within TDS’s App Manager.
- Select the Data Sources link under the Databases group heading.
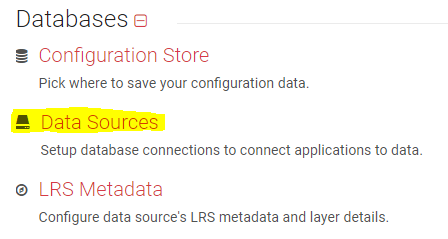
- Edit (or create) the data source that is configured to use a secure map service (federated with Portal for ArcGIS).
- Ensure that the Associated Service URL is configured to point directly to the secure map service.
- Check the Service requires ArcGIS for Portal authorization check box option.

- Click Save.
- Any application that uses this data source will now initiate the sign in process with Portal (when applicable).
- Load an application profile that is using a data source that is marked as Service requires ArcGIS for Portal authorization.
- Ensure that the application prompts the user to authenticate with Portal for ArcGIS (as described in the “Functionality Overview” section above).
If an issue occurs during portal authentication, review the message that will be displayed in the Portal popup window or review the application logs (found under Help > Logs). The following is a list of common misconfiguration and diagnostic steps:
- Redirect page stuck on ArcGIS Page with message of “Invalid redirect_uri”
- Issue: This message means that the redirect URL configured within Portal for ArcGIS is not the same URL that the user is accessing the site from.
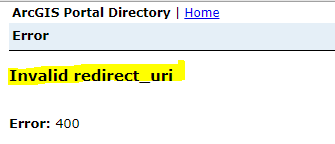
- Solution: Compare the base of the URL from the browser of the application with the URL that was configured with Portal for ArcGIS. Update the “Redirect URI” to include a valid URL.
Tip: You can copy the URL of the popup window and run the URL through any HTML/URL decoder to see what the exact redirect URL is being passed to Portal (it will be present as a query parameter named “redirect_uri”.
- Issue: This message means that the redirect URL configured within Portal for ArcGIS is not the same URL that the user is accessing the site from.
Workflow
After App Manager has been properly configured, you will do the following steps when accessing an application that consumes this data.
Heads Up! If the application does not have a map interface or does not have any Profile Configuration settings that use the map service, you will not need to sign in to Portal.
- You launch an application from App Manager that has a data source which is pointing to a secure Map Server that is federated with Portal for ArcGIS.
- The application opens to a dialog asking you to Sign in to Portal.
Note: It is necessary to confirm this action in order to prevent the browser popup blocker from blocking the next step.
- Click SIGN IN.
- A popup window will open with the Portal for ArcGIS authentication method (the exact method varies based on your Portal configuration).
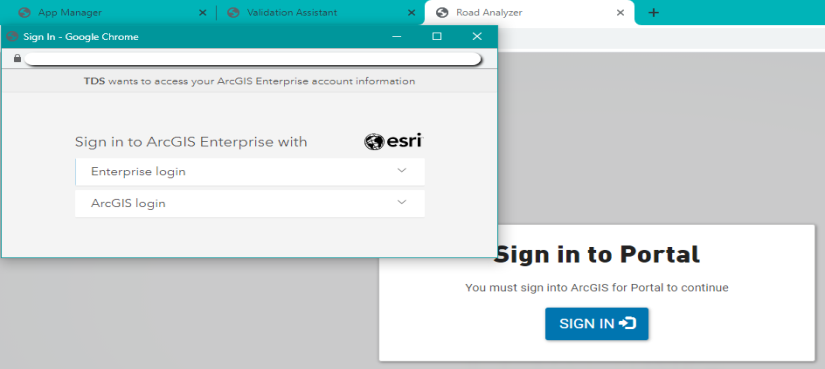
- After you are authenticated within Portal for ArcGIS, the popup window and dialog will close and the application will continue loading as normal.
Tip: The token will automatically be refreshed behind the scenes with Portal for as long as it can. However, once the token can no longer be refreshed you will be required to repeat steps 2 through 4 to obtain a new access token.
